History Colorado Center, Denver, CO

History Colorado Center, Denver, CO

History Colorado Center in Denver, Colorado is home to the Woodard Collection of Rio Grande textiles. From the same family, the Luther Bean Museum received the Woodard Collection of southwest pottery, retablos (Hispanic sacred paintings on wood), and antiques. Part of the internship was to visit museums with collections similar to ours and to learn how they manage various aspects of their collections. I contacted History Colorado and met with Bethany Williams, Collections Manager. In advance of our meeting, she sent me a document listing the Woodard Collection textiles with photographs, so that I could choose several to view during my visit.

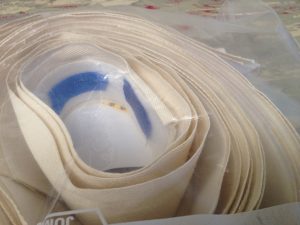
We started in the cavernous room that houses a large portion of their textile collections. Climate is controlled at 70 degrees F with 40% humidity. Rows of huge rolling racks hold the textiles on separate rods. The textiles are rolled around an archival tube with archival tissue paper to avoid dye transfer from one part of a textile to another. The rolled textile is then wrapped in a layer of plastic and the ends of the plastic are secured with cotton twill tape.

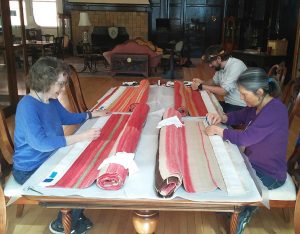
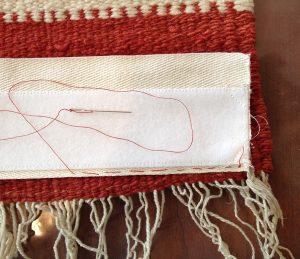
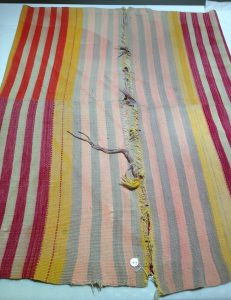
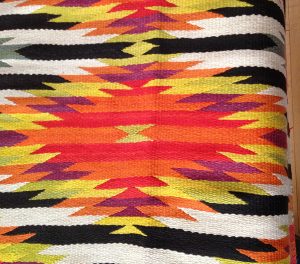
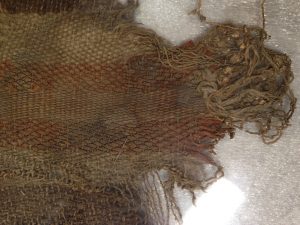
In another large room, I viewed three Rio Grande textiles from the Woodard Collection. The tag attached to the textile has extensive identifying information in addition to the accession number. It includes a photograph, a description of the object with colors, the object dimensions, the donor and date, and instructions on how to store the object.

For pest management, they use sticky traps deployed at entrances, corners, and at intervals, and regular spraying for ants and spiders. When needed, live traps are used for mice. If evidence of moths or carpet beetles is found, they freeze the textiles and then vacuum both sides using a Nilfisk vacuum with adjustable suction and a screen at the nozzle.

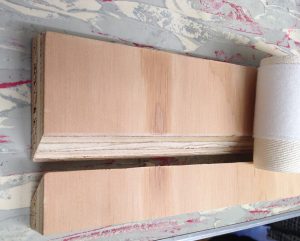
History Colorado displays textiles using a cotton muslin sleeve through which may be inserted a metal rod or magnets. They are moving to using slant boards at a 30-degree angle to help support and to avoid the stress of gravity on the textiles. Their slant boards are fabricated of low-VOC MDF wood with a layer of Mylar between the MDF and the textile. We also reviewed collections documentation and management on the Argus database system, which enables public access to search their collections.

Rio Grande Textiles Exhibit: Planning and Design

We were fortunate to work with Tom Worley from Facilities Services and met with Tom initially to discuss options for mounting hardware and hanging methods for the Rio Grande textiles. Because the textiles would be mounted high up on the stairwell walls, and installation would take place from the top of a ladder maneuvered on the stairs, the choice of hardware was important to accommodate ease of installation of the hardware and the textiles.

Wood cleat mounting hardware mock-up

Tom got back to us with a mock-up for a wood cleat mounting hardware system. The narrow strip of wood is the cleat that is attached to the wall. It has a mitered 45-degree angle that slants downward to the wall. The wider strip of wood, which would have Velcro hook strips attached with stainless steel staples, also has a mitered 45-degree angle and nestles down into the cleat. Jeanne, our Conservator, approved this hanging method, but not oak, the wood suggested by Tom. Oak is highly acidic, and even if sealed, can be harmful to the textiles.

So I set out to research woods with an appropriate pH. A document of exhibit materials from the Canadian Conservation Institute included a chart of a wide variety of woods and their pH, as well as wood sealants. Next, I looked at the Workshop Companion website and their chart of the mechanical properties of woods, including wood density and strength and the ease of use with power tools. By comparing the two sources, I chose several possible woods. When I ran these by Tom, he found that they were either very expensive or difficult to get in our rural location, so I made another round of searching. We decided on maple wood and I gave Tom the preliminary textile measurements so that he could order the materials. Final measurements for fabrication would be not available until the sewing of the Velcro/twill strips to the textiles was completed. Those accurate measurements were important, as the wood cleats had to be only 3/8” longer than the Velcro/twill strips.

Tom Worley of Facilities Services

The last step of this part of the exhibit design was to determine the placement of the textiles on the stairwell walls. Tom again helped us by bringing a 4 ft by 8 ft sheet of heavy cardboard reinforced with thin wood strips to act as stand-in for the textiles. On the ladder, he patiently shifted the cardboard up, down, and sideways until Tawney and I were satisfied with the placement, and then measured the placements for each textile so that the wood cleats would be centered and installed at the correct heights.

Sewing Party

We had set the date of Saturday, March 9, 2019 for the sewing party and I had sent an advance email, requesting volunteers from our museum advisory committee to help sew. The sewing of the Velcro/twill strips does not need to be done by a professional, but it does require care and attention to detail in order that the stitches distribute the weight of the textile evenly, and that the sewing thread runs between the warp and weft yarns rather than piercing any of the textile yarns. On the Friday before our sewing party, Tawney and I set out four textiles and the sewing supplies: tapestry needles, colored thread, scissors, and the corresponding Velcro/twill strips.

Sewing Velcro/twill strips to textiles at the Luther Bean Museum

On Saturday morning, four of us met at the Luther Bean Museum for our sewing party: Tawney Becker, Linda Relyea, Delfin Weis, and me. We worked around the very long dining table that serves as our conference table in the museum. I showed each person how to place the Velcro/twill strip along the end of the textile and how to sew the strip onto the textile. Also, and very importantly, how to avoid piercing the textile threads, which means a constant look at where the tip of the needle is coming through the textile on each side of the textile. For the sewing novices like me, it is a slow sewing process. Linda, with sewing experience, was the star! In the three hours that we sewed that morning, we greatly advanced this part of the project. Tawney and I finished sewing the strips to the textiles over the following weeks.

Preparations for Textile Sewing

Velcro loop machine sewn onto cotton twill

After reviewing best practices for textile support systems, we chose the Velcro support system for its ease of installation, for its even distribution of weight across the width of the textile, and for its strength and ability to support heavy textiles. We purchased spools of Velcro (which comes in two parts: loops and hooks) and cotton twill. Tawney’s friend, Rhonda Borders, was kind enough to machine sew Velcro loop strips onto the cotton twill strips for each of thirteen textiles. The extra strips would enable us to display other textiles in a future display or to rotate textiles in a display. I labeled each Velcro/twill strip with the accession number (means of identification of objects) of its corresponding textile.

Next, I reviewed best practices for sewing onto textiles and discussed needles, thread, and sewing techniques with Jeanne Brako, our textile Conservator. (I met Jeanne on the trip to the Center of Southwest Studies as discussed in the blog: A Fortuitous Journey, published Oct 9, 2018.) Jeanne was kind enough to serve as our pro bono Conservator throughout this project.

Having printed a sheet of color photographs of the textiles, I went to a quilting shop to gather supplies for sewing. This included tapestry needles, which have a blunt end and are less likely to damage the wool yarns of the textiles, and 100% cotton quilting thread in various colors to match the textile ends where the Velcro/twill strips would be sewn onto the textiles.

Sewing Velcro/twill strip onto textile

With tools and supplies in hand, I now learned how to sew the Velcro/twill strips onto the textiles. This was accomplished mainly through emails, phone calls, and texted photographs of my stitches on a practice strip to Jeanne, to get her approval on my technique (which wasn’t pretty but would do the job). Once the sewing was under way, it was time to bring in the troops for a sewing party.

Rio Grande Textiles Exhibit: Concept

The main project of my internship was to curate, plan, and develop an exhibit of Rio Grande textiles from the Luther Bean Museum (LBM) collection. I had learned much from my own research, the Mark Winter NMAM 2018 conference lectures, and especially my visits to the Millicent Rogers Museum. My concept for the exhibit was to showcase the two main weaving techniques of Rio Grande textiles: double width and two widths seamed (as discussed in the blog: Rio Grande Textile Weaving Details, published Feb 14, 2019). I also wanted to display a variety of colors and band patterning. From the collection, I selected eight textiles for the exhibit.

Textile needs conservation treatment – LBM collection

Because the Luther Bean Museum has limited wall space for additional exhibits, the Rio Grande textiles exhibit would be hung in the stairwell between the main floor and the mezzanine level. I measured the walls, horizontals and verticals, and determined the distance that we would wish to maintain above the handrails. I made a number of iterations of display designs, attempting to place all eight textiles in the stairwell walls, but it would be a tight fit. With Tawney’s input, I concluded that I could place only one textile on each of four walls and a fifth textile on the mezzanine level.

We needed to inspect all of the selected textiles to ensure that they were in good condition for display. One by one, Tawney and I brought out the textiles, inspected for stability, determined the hanging end and hanging face, and measured the ends (since the measurements almost always differ). We determined that several were not suitable for display without conservation treatment. Several textiles, as in the above photograph, had damaged ends, and a few others had small areas of damage. In these cases, we felt that the textile was not sufficiently stable to withstand the stress of hanging. I was able to keep the exhibit concept, but revised the textiles that would be displayed.

Consultant visit by Mark and Linda Winter: on the Navajo and Anasazi Textiles

Navajo Chief Blanket – LBM Collection

The first Navajo textile we viewed during Mark and Linda Winter’s consultant visit to the Luther Bean Museum (LBM) was a late phase Chief blanket in very good condition. Mark folded the blanket to show how the pattern would appear when worn. I found it amazing that these patterns were designed in the mind of the weaver rather than drawn on paper.


Navajo Eye Dazzler – LBM Collection

Next we viewed a beautiful Eye Dazzler. Although the serrated designs were likely initially inspired by Mexican Saltillo blanket designs, the Navajo made serrated designs their own. For centuries, Navajo dye colors had been limited, in part because imported dyestuffs were expensive. But when commercial synthetic dyes became available in the latter part of the nineteenth century, Navajo blankets exploded with a myriad of bright colors. Eye Dazzler blankets were known for these brilliant colors in dazzling serrated designs.

We viewed three Navajo weavings from the early twentieth century, when the tourist and Eastern markets for Native-American and southwestern goods was well established, and dealers were influencing the designs of Navajo weavings for that commercial market. One of these was a beautiful Chinle Revival blanket.

Late Anasazi Textile Fragment – LBM Collection

The last of the Native-American pieces was a fragment of a late Anasazi textile. This is a rare specimen. Mark pointed out the skillful weaving of alternating weft colors in some bands of the fragment and the vegetal or mineral dye used to color the cotton yarns.

Mark gave us background information on the textiles, for example, explaining the phases into which Chief blankets are classified according to the design, wool, and dyes, in addition to estimates of date ranges and probable dyes used in the textiles.