History Colorado Center, Denver, CO

History Colorado Center, Denver, CO

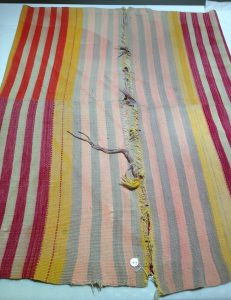
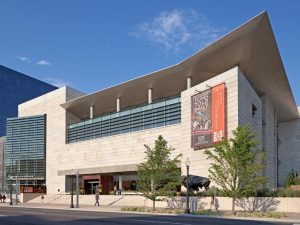
History Colorado Center in Denver, Colorado is home to the Woodard Collection of Rio Grande textiles. From the same family, the Luther Bean Museum received the Woodard Collection of southwest pottery, retablos (Hispanic sacred paintings on wood), and antiques. Part of the internship was to visit museums with collections similar to ours and to learn how they manage various aspects of their collections. I contacted History Colorado and met with Bethany Williams, Collections Manager. In advance of our meeting, she sent me a document listing the Woodard Collection textiles with photographs, so that I could choose several to view during my visit.

We started in the cavernous room that houses a large portion of their textile collections. Climate is controlled at 70 degrees F with 40% humidity. Rows of huge rolling racks hold the textiles on separate rods. The textiles are rolled around an archival tube with archival tissue paper to avoid dye transfer from one part of a textile to another. The rolled textile is then wrapped in a layer of plastic and the ends of the plastic are secured with cotton twill tape.

In another large room, I viewed three Rio Grande textiles from the Woodard Collection. The tag attached to the textile has extensive identifying information in addition to the accession number. It includes a photograph, a description of the object with colors, the object dimensions, the donor and date, and instructions on how to store the object.

For pest management, they use sticky traps deployed at entrances, corners, and at intervals, and regular spraying for ants and spiders. When needed, live traps are used for mice. If evidence of moths or carpet beetles is found, they freeze the textiles and then vacuum both sides using a Nilfisk vacuum with adjustable suction and a screen at the nozzle.

History Colorado displays textiles using a cotton muslin sleeve through which may be inserted a metal rod or magnets. They are moving to using slant boards at a 30-degree angle to help support and to avoid the stress of gravity on the textiles. Their slant boards are fabricated of low-VOC MDF wood with a layer of Mylar between the MDF and the textile. We also reviewed collections documentation and management on the Argus database system, which enables public access to search their collections.

Rio Grande Textiles Exhibit: Planning and Design

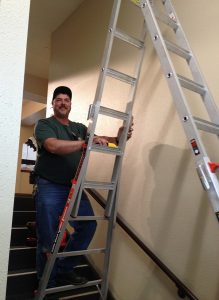
We were fortunate to work with Tom Worley from Facilities Services and met with Tom initially to discuss options for mounting hardware and hanging methods for the Rio Grande textiles. Because the textiles would be mounted high up on the stairwell walls, and installation would take place from the top of a ladder maneuvered on the stairs, the choice of hardware was important to accommodate ease of installation of the hardware and the textiles.

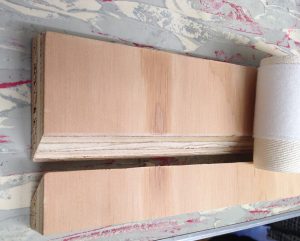
Wood cleat mounting hardware mock-up

Tom got back to us with a mock-up for a wood cleat mounting hardware system. The narrow strip of wood is the cleat that is attached to the wall. It has a mitered 45-degree angle that slants downward to the wall. The wider strip of wood, which would have Velcro hook strips attached with stainless steel staples, also has a mitered 45-degree angle and nestles down into the cleat. Jeanne, our Conservator, approved this hanging method, but not oak, the wood suggested by Tom. Oak is highly acidic, and even if sealed, can be harmful to the textiles.

So I set out to research woods with an appropriate pH. A document of exhibit materials from the Canadian Conservation Institute included a chart of a wide variety of woods and their pH, as well as wood sealants. Next, I looked at the Workshop Companion website and their chart of the mechanical properties of woods, including wood density and strength and the ease of use with power tools. By comparing the two sources, I chose several possible woods. When I ran these by Tom, he found that they were either very expensive or difficult to get in our rural location, so I made another round of searching. We decided on maple wood and I gave Tom the preliminary textile measurements so that he could order the materials. Final measurements for fabrication would be not available until the sewing of the Velcro/twill strips to the textiles was completed. Those accurate measurements were important, as the wood cleats had to be only 3/8” longer than the Velcro/twill strips.

Tom Worley of Facilities Services

The last step of this part of the exhibit design was to determine the placement of the textiles on the stairwell walls. Tom again helped us by bringing a 4 ft by 8 ft sheet of heavy cardboard reinforced with thin wood strips to act as stand-in for the textiles. On the ladder, he patiently shifted the cardboard up, down, and sideways until Tawney and I were satisfied with the placement, and then measured the placements for each textile so that the wood cleats would be centered and installed at the correct heights.

Sewing Party

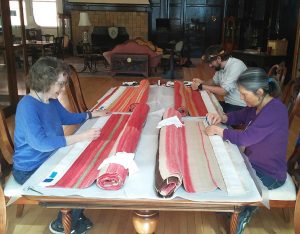
We had set the date of Saturday, March 9, 2019 for the sewing party and I had sent an advance email, requesting volunteers from our museum advisory committee to help sew. The sewing of the Velcro/twill strips does not need to be done by a professional, but it does require care and attention to detail in order that the stitches distribute the weight of the textile evenly, and that the sewing thread runs between the warp and weft yarns rather than piercing any of the textile yarns. On the Friday before our sewing party, Tawney and I set out four textiles and the sewing supplies: tapestry needles, colored thread, scissors, and the corresponding Velcro/twill strips.

Sewing Velcro/twill strips to textiles at the Luther Bean Museum

On Saturday morning, four of us met at the Luther Bean Museum for our sewing party: Tawney Becker, Linda Relyea, Delfin Weis, and me. We worked around the very long dining table that serves as our conference table in the museum. I showed each person how to place the Velcro/twill strip along the end of the textile and how to sew the strip onto the textile. Also, and very importantly, how to avoid piercing the textile threads, which means a constant look at where the tip of the needle is coming through the textile on each side of the textile. For the sewing novices like me, it is a slow sewing process. Linda, with sewing experience, was the star! In the three hours that we sewed that morning, we greatly advanced this part of the project. Tawney and I finished sewing the strips to the textiles over the following weeks.

Preparations for Textile Sewing

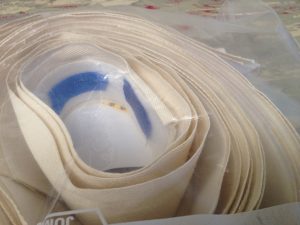
Velcro loop machine sewn onto cotton twill

After reviewing best practices for textile support systems, we chose the Velcro support system for its ease of installation, for its even distribution of weight across the width of the textile, and for its strength and ability to support heavy textiles. We purchased spools of Velcro (which comes in two parts: loops and hooks) and cotton twill. Tawney’s friend, Rhonda Borders, was kind enough to machine sew Velcro loop strips onto the cotton twill strips for each of thirteen textiles. The extra strips would enable us to display other textiles in a future display or to rotate textiles in a display. I labeled each Velcro/twill strip with the accession number (means of identification of objects) of its corresponding textile.

Next, I reviewed best practices for sewing onto textiles and discussed needles, thread, and sewing techniques with Jeanne Brako, our textile Conservator. (I met Jeanne on the trip to the Center of Southwest Studies as discussed in the blog: A Fortuitous Journey, published Oct 9, 2018.) Jeanne was kind enough to serve as our pro bono Conservator throughout this project.

Having printed a sheet of color photographs of the textiles, I went to a quilting shop to gather supplies for sewing. This included tapestry needles, which have a blunt end and are less likely to damage the wool yarns of the textiles, and 100% cotton quilting thread in various colors to match the textile ends where the Velcro/twill strips would be sewn onto the textiles.

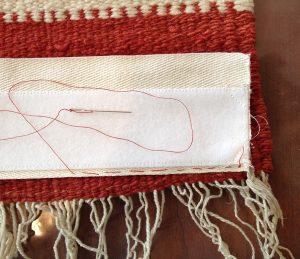
Sewing Velcro/twill strip onto textile

With tools and supplies in hand, I now learned how to sew the Velcro/twill strips onto the textiles. This was accomplished mainly through emails, phone calls, and texted photographs of my stitches on a practice strip to Jeanne, to get her approval on my technique (which wasn’t pretty but would do the job). Once the sewing was under way, it was time to bring in the troops for a sewing party.

Rio Grande Textiles Exhibit: Concept

The main project of my internship was to curate, plan, and develop an exhibit of Rio Grande textiles from the Luther Bean Museum (LBM) collection. I had learned much from my own research, the Mark Winter NMAM 2018 conference lectures, and especially my visits to the Millicent Rogers Museum. My concept for the exhibit was to showcase the two main weaving techniques of Rio Grande textiles: double width and two widths seamed (as discussed in the blog: Rio Grande Textile Weaving Details, published Feb 14, 2019). I also wanted to display a variety of colors and band patterning. From the collection, I selected eight textiles for the exhibit.

Textile needs conservation treatment – LBM collection

Because the Luther Bean Museum has limited wall space for additional exhibits, the Rio Grande textiles exhibit would be hung in the stairwell between the main floor and the mezzanine level. I measured the walls, horizontals and verticals, and determined the distance that we would wish to maintain above the handrails. I made a number of iterations of display designs, attempting to place all eight textiles in the stairwell walls, but it would be a tight fit. With Tawney’s input, I concluded that I could place only one textile on each of four walls and a fifth textile on the mezzanine level.

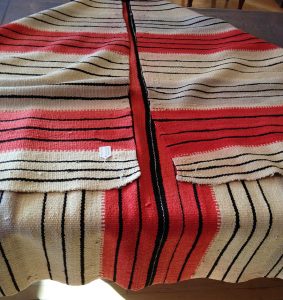
We needed to inspect all of the selected textiles to ensure that they were in good condition for display. One by one, Tawney and I brought out the textiles, inspected for stability, determined the hanging end and hanging face, and measured the ends (since the measurements almost always differ). We determined that several were not suitable for display without conservation treatment. Several textiles, as in the above photograph, had damaged ends, and a few others had small areas of damage. In these cases, we felt that the textile was not sufficiently stable to withstand the stress of hanging. I was able to keep the exhibit concept, but revised the textiles that would be displayed.

Consultant visit by Mark and Linda Winter: on the Navajo and Anasazi Textiles

Navajo Chief Blanket – LBM Collection

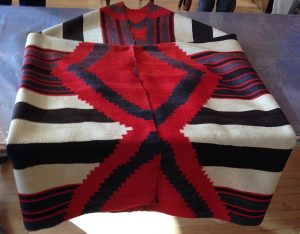
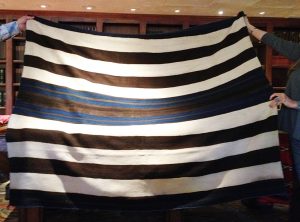
The first Navajo textile we viewed during Mark and Linda Winter’s consultant visit to the Luther Bean Museum (LBM) was a late phase Chief blanket in very good condition. Mark folded the blanket to show how the pattern would appear when worn. I found it amazing that these patterns were designed in the mind of the weaver rather than drawn on paper.


Navajo Eye Dazzler – LBM Collection

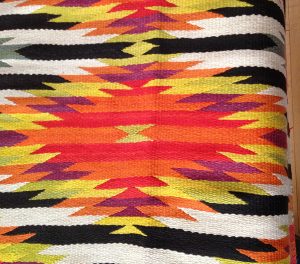
Next we viewed a beautiful Eye Dazzler. Although the serrated designs were likely initially inspired by Mexican Saltillo blanket designs, the Navajo made serrated designs their own. For centuries, Navajo dye colors had been limited, in part because imported dyestuffs were expensive. But when commercial synthetic dyes became available in the latter part of the nineteenth century, Navajo blankets exploded with a myriad of bright colors. Eye Dazzler blankets were known for these brilliant colors in dazzling serrated designs.

We viewed three Navajo weavings from the early twentieth century, when the tourist and Eastern markets for Native-American and southwestern goods was well established, and dealers were influencing the designs of Navajo weavings for that commercial market. One of these was a beautiful Chinle Revival blanket.

Late Anasazi Textile Fragment – LBM Collection

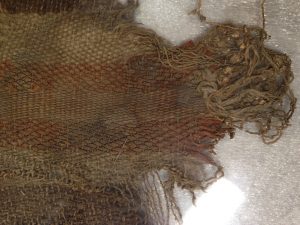
The last of the Native-American pieces was a fragment of a late Anasazi textile. This is a rare specimen. Mark pointed out the skillful weaving of alternating weft colors in some bands of the fragment and the vegetal or mineral dye used to color the cotton yarns.

Mark gave us background information on the textiles, for example, explaining the phases into which Chief blankets are classified according to the design, wool, and dyes, in addition to estimates of date ranges and probable dyes used in the textiles.


Consultant visit by Mark and Linda Winter: on the Rio Grande Textiles

As part of Mark and Linda Winter’s consultant visit, we viewed the Luther Bean Museum’s (LBM) collection of Rio Grande textiles. I was particularly interested in the approximate periods, the type of wool used, and the nature of the dyes. Most of the textiles appear to be from the period of about 1870 to 1890. Wools included pure churro, merino-mix, and merino-contaminated churro. One may include mohair. The variety in the handspun wool showed differences in spinning methods, skill, and wool. Two of the textiles had been felted, from washing in hot water with agitation; possibly this happened more recently, in a washing machine.

Rio Grande Blanket, Collection of the LBM

There is no way to tell where the Rio Grande blankets may have been woven from looking at them because similar weavings were done all up and down the Rio Grande, so we could not identify artisans or regions. Most of the textiles incorporated natural, undyed wool colors, while many of the wool dyes were likely aniline. Some showed fading and running. Early aniline dyes were quite fugitive, fading easily. And probably due to the lack of water in this region, some wool was not thoroughly washed after dying, which could result in running of the dyes.

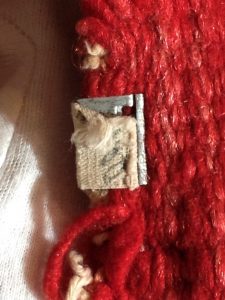
Cleaning tag on textile, Collection of the LBM

Mark showed us where some textiles had been cut down from their original lengths. He showed us original and later knots in the warp ends. He also showed us that one piece had sprung warps. The warps were under too much tension and broke, springing back to where they no longer were under tension, leaving loose sections of weft. We even found a probable dry cleaners tag on one of the textiles.

Mark identified our best pieces, selecting each for different reasons: purity of the wool, weaving skill, technical difficulty and excellence of a design, attention to detail in seaming, and the original nature of a piece, including one that he described as “loom-fresh” or having little wear

Consultant visit by Mark and Linda Winter: on the Luther Bean Museum Southwest Textile Collection

After meeting Mark and Linda Winter while attending Mark’s lectures “Taos Trade through Textiles” as part of the 2018 NMAM Conference, I hoped to have them consult on the Luther Bean Museum’s collection of Rio Grande and Navajo textiles. I emailed Mark and Linda and they responded that they would be happy to come view our collection! We arranged the visit for Thursday January 3, 2019 and wished for good winter weather.

Mark and Linda Winter at the Luther Bean Museum

Mark and Linda drove up from outside Taos, NM. Mark gave us a brief history of Rio Grande textiles and then we began viewing the textiles. Because there were 25 textiles in all, each view was necessarily brief. We viewed and discussed 10 textiles before breaking for lunch, and then viewed the remaining 15 textiles. We finished up late in the afternoon and gave Mark and Linda a short tour of the museum after which they headed back to New Mexico. It was a whirlwind of a day and we did gather a lot of information on our collection.

Mark and Linda brought an early Rio Grande blanket from their own collection to show us, as well as a number of books and articles that are good reference materials. They also kindly donated several books to the museum.

We deeply thank Mark and Linda Winter for their pro bono consultation and are very grateful for their willingness to come to the Luther Bean Museum and provide their knowledge and insight on our collection of Rio Grande and Navajo textiles.


Taos Trade through Textiles, Part II

Lecture by Mark Winter and Chris Ferguson on Pueblo and Navajo Textiles, at the 2018 NMAM Conference, Taos, NM

Immediately following their lecture on Saltillo and Rio Grande blankets, Mark Winter and Chris Ferguson did a second lecture on Pueblo and Navajo textiles. The Luther Bean Museum is home to six Navajo textiles so I was interested to see this lecture and the textile examples that Mark would provide.

Early Pueblo Indians initially used a backstrap loom but around 700 A.D. they converted to a vertical loom using a continuous warp. They farmed cotton for weaving and, after the Spanish introduced sheep to the region, switched to wool. Pueblos produced a woven square cloth called a manta, worn as a shawl or dress. Around 1600, the Navajo picked up weaving skills and adopted the Pueblo upright loom, typically weaving textiles that were wider than they were long. They became very skilled weavers, producing highly prized and expensive textiles, so tightly woven that they had a waterproof quality.

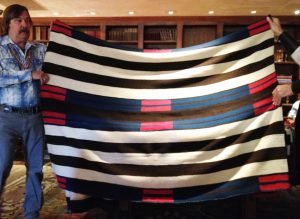
1st Phase Chief Blanket,
courtesy of Mark and Linda Winter

By 1805 the Navajo were already weaving “Chief” blankets in the style referred to as 1st Phase. These had two brown and three white bands at the top and bottom, and two sets of double indigo bands at the center.


2nd Phase Chief Blanket,
courtesy of Mark and Linda Winter


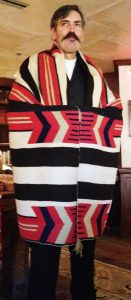
Navajos valued the red color seen in Mexican serapes, flannels, and other cloth. In raids, they carried off all of the red cloth (bayeta) they found, raveled the yarns, and wove it into their textiles. Traders and trappers carried red cloth for bargaining. This bayeta appears in the 2nd Phase Chief blankets of circa 1855 to 1865. Initially these blankets had twelve sets of red bars within the brown and indigo bands.

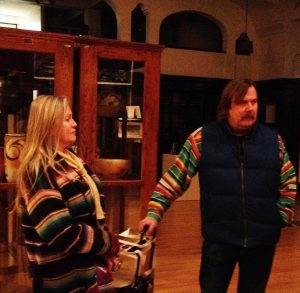
Modified 2nd Phase blankets, such as the one modeled by Chris Ferguson in the photograph on the left, incorporated more and more red and were so valued that one blanket was worth ten buffalo robes.


3rd Phase Chief Blanket, courtesy of Mark and Linda Winter


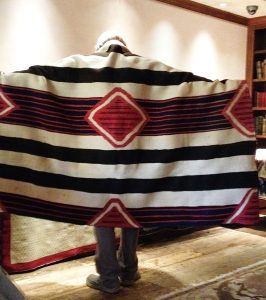
In 3rd Phase Chief’s blankets, red bayeta in the design included nine spots or diamonds and additional red stripes within the indigo bands. Variations of this phase have intricate designs. Mark Winter models the blanket in the photograph on the right.

Designs were conceived as they would appear on the wearer and were held in the mind of the weaver as they were translated into the woven textile.


4th Phase Chief Blanket, courtesy of Mark and Linda Winter

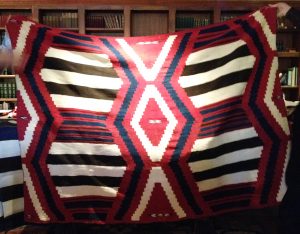
By 1865 to 1875, the diamonds had grown so large that they had coalesced in the 4th Phase Chief blankets. In variants of this phase the diamonds became crosses, and after 1860, aniline (synthetic) dyes were incorporated as well.

In addition to the Chief blankets, other Navajo textiles included: serapes (blankets) with red bayeta, and indigo stripes on a large field of natural white, and Navajo versions of Mexican Saltillos with intricate designs on large red fields. Navajo blankets were in high demand after the 1821 opening of the Santa Fe Trail, and remained so later, with the coming of the trains in the 1880s, for the tourist trade.

Object Conservation and Handling Workshop

I attended the Object Conservation and Handling Workshop at the Millicent Rogers Museum (MRM) in Taos, New Mexico. The workshop was led by Dr. Caroline Jean Fernald, Executive Director of the museum and Carmela Quinto, Curator of Collections. Rather than sit in a conference room, we moved through the different galleries, as they were relevant to aspects of the lecture.

“Donut” and foam sheet under fragile pottery at the MRM

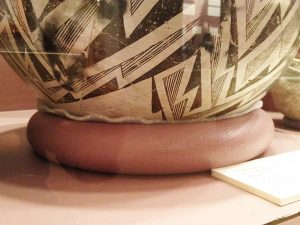
Pottery is breakable, so the museum uses “donuts” made from insulation foam or Styrofoam, lined with clear plastic. The foam donuts are cut to length, the ends are hot-glued together, and the donut is painted to match the pot that it will be holding. Some pots can sit on their sides in such donuts. Other pottery sits on heavy plastic or thin foam sheets that are cut to size. Pots can slide with the vibrations from foot traffic, but the plastic has enough friction with the base of the pot so that the pots remain in place. Staff regularly checks the pots to make sure they are secure. Pottery is dusted with canned air.

The museum has hardwood floors throughout. Any hard flooring material is much better than carpet, which can harbor pests. Textiles are vulnerable to moths. A pest control service sprays specifically for moths once per month. If evidence of moth activity is found, both sides of the textile are vacuumed and the textile is frozen to kill pests.

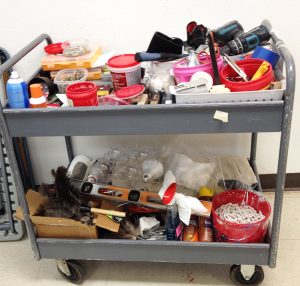
Curator’s cart at the MRM

The museum is gradually changing to all LED lights. Prints and photographic works are framed with UV-coated museum glass. The glass in the gallery windows is UV protected. Matted or framed prints and photographs are taken apart to determine if archival materials have been used. If not, they are re-matted with acid-free materials and re-framed. For jewelry, moisture can be a problem, so our dry climate helps. The glass cases are not completely airtight because some airflow is necessary. Unfortunately, even the small openings allow bugs and critters to enter the cases. Lizard excretions can damage metals. Retablos and Bultos are displayed in glass-fronted cases. They are dusted with a feather duster, or a soft cloth if needed.

Cultural sensitivity has become part of museum ethics in recent decades. The MRM is the first museum to make policy that protects culturally sensitive artifacts. Accordingly, the MRM no longer displays burial pots or sensitive items from communities such as the Penitentes. The museum collections of these types of items are housed in a vault.

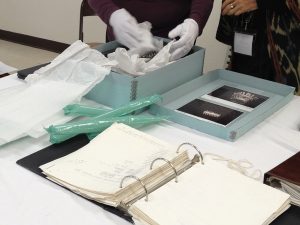
Gloves to handle objects at the workshop

When handling objects, it is best to wear nitrile or cotton gloves to protect yourself and to protect the objects. This is especially important when handling textiles, since it is unknown what chemicals may be embedded. Textiles may have been sprayed for pests or cleaned with chemicals. It is helpful to wear a lab coat or apron to protect clothing and to use a full particulate mask when cleaning objects.