
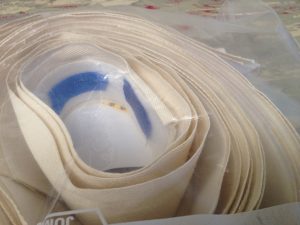
Velcro loop machine sewn onto cotton twill
After reviewing best practices for textile support systems, we chose the Velcro support system for its ease of installation, for its even distribution of weight across the width of the textile, and for its strength and ability to support heavy textiles. We purchased spools of Velcro (which comes in two parts: loops and hooks) and cotton twill. Tawney’s friend, Rhonda Borders, was kind enough to machine sew Velcro loop strips onto the cotton twill strips for each of thirteen textiles. The extra strips would enable us to display other textiles in a future display or to rotate textiles in a display. I labeled each Velcro/twill strip with the accession number (means of identification of objects) of its corresponding textile.
Next, I reviewed best practices for sewing onto textiles and discussed needles, thread, and sewing techniques with Jeanne Brako, our textile Conservator. (I met Jeanne on the trip to the Center of Southwest Studies as discussed in the blog: A Fortuitous Journey, published Oct 9, 2018.) Jeanne was kind enough to serve as our pro bono Conservator throughout this project.
Having printed a sheet of color photographs of the textiles, I went to a quilting shop to gather supplies for sewing. This included tapestry needles, which have a blunt end and are less likely to damage the wool yarns of the textiles, and 100% cotton quilting thread in various colors to match the textile ends where the Velcro/twill strips would be sewn onto the textiles.
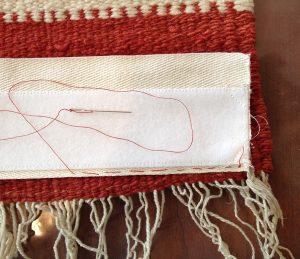
Sewing Velcro/twill strip onto textile
With tools and supplies in hand, I now learned how to sew the Velcro/twill strips onto the textiles. This was accomplished mainly through emails, phone calls, and texted photographs of my stitches on a practice strip to Jeanne, to get her approval on my technique (which wasn’t pretty but would do the job). Once the sewing was under way, it was time to bring in the troops for a sewing party.